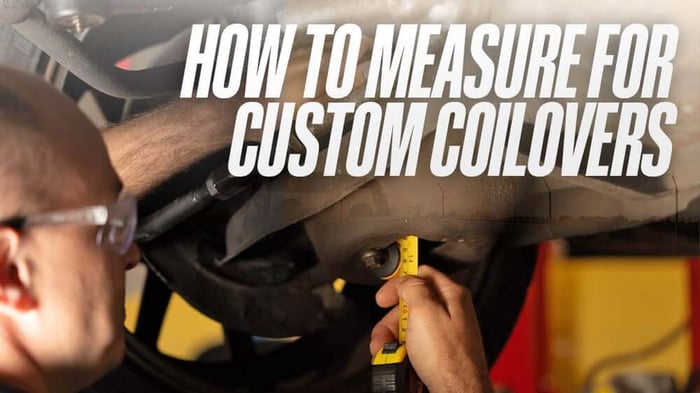
How to Measure for Custom Shocks (Step-by-Step)
Table of Contents
Do We Make Shocks for Your Vehicle? (Probably!) Here’s How to Measure the Right QA1 Shock
Short answer: If your vehicle uses a stud, eyelet, or T-bar shock, there’s a strong chance either QA1 stock mount shocks or custom shocks, will fit— even if it’s not in our catalog.
Set ride height first: Put the vehicle at true ride height (full weight) before measuring.
Measure once, buy right: Capture mount style + at-ride length and confirm travel (aim for ~2" compression and ~2" rebound minimum).
Next step: Cross-reference our shock length tables or contact QA1 Tech at (952) 985-5675.
How to Measure Shock Length for Custom Shocks
Set the vehicle at the ride height it will use on the road. Let the suspension rest under full weight.
If you’re mid-build without springs installed, jack the wheel/tire to your desired ride height and measure between mounts.
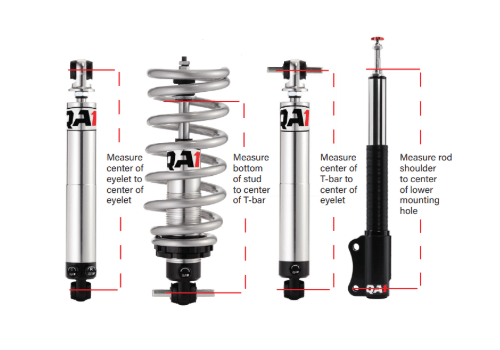
What to measure at ride height
Eyelet ↔ Eyelet: center-to-center of the mounting bolts
Stud ↔ T-bar: from the bottom of the washer below the stud to the center of the T-bar
T-bar ↔ Eyelet: center of the T-bar to center of the eyelet
No shocks installed: measure between the chassis/axle shock mounting points at ride height
Also record:
Eyelet bolt size (diameter)
T-bar width & bolt spacing
Any clearance constraints (sway bar, frame, exhaust)
Quick mount-type guide
| Mount Style | What to capture | Common notes |
|---|---|---|
| Eyelet–Eyelet | Center-to-center length at ride; eyelet bolt diameter | Verify bushing width/misalignment spacers |
| Stud–T-bar | Bottom of stud’s lower washer → T-bar center; T-bar width + bolt spacing | Confirm stud thread size/pitch |
| T-bar–Eyelet | T-bar center → eyelet center; T-bar width + spacing; eyelet bolt diameter | Check bracket width at chassis/axle |
| No shock in place | Bracket-to-bracket distance at true ride height | Watch bumpstop/limit-strap range |
How much travel do I need?
Start with wheel travel, then convert to shock travel using your motion ratio (shock movement ÷ wheel movement).
Street baseline (at the wheel): ~2.5–3.0" compression and 2.0–2.5" rebound
Solid axle: shocks typically mount to the axle → ~1.0 (1:1), so shock travel ≈ wheel travel
Independent (IFS): typical 0.50–0.66 motion ratio, so the shock moves 0.5–0.66" per 1" of wheel travel
Angled shocks: effective motion ratio decreases (account for angle)
Set ride height near mid-stroke, slightly biased to compression for street use. Verify bumpstops and droop limits so the shock is not the travel limiter.
Want a deeper dive? See our shock travel measuring guide.
Selecting your QA1 solution
Based on your measurements, QA1 Tech may recommend:
Custom-mount shocks that match your length/mounts
Stock-mount shocks that dimensionally fit your setup
Stock-mount coil-overs that fit even if your platform isn’t listed
Springs + spring-rate guidance, or a rear weld-in coil-over system if you’re converting
QA1 shocks are hydraulic (no gas charge), so they don’t add spring rate and won’t lose a gas charge over time. They can be mounted in any orientation without performance loss.
What to do with your measurements
Record mount style + at-ride length + hardware sizes.
Cross-reference shock length tables found in the QA1 Catalog pages 6-13 (compressed/extended/at-ride).
Confirm the shock provides sufficient compression & rebound from ride height.
If unsure, contact QA1 Tech—include your measurements, photos, and planned ride height.
Helpful links:
Shop by Vehicle → https://qa1.net/vehicles/
Stock-Mount Shocks → https://qa1.net/shocks-struts/drag-street/
Coil-Over Conversions → https://qa1.net/suspension-kits-systems/
QA1 Catalog: https://qa1.net/content/Catalogs/QA1-2025-Motorsports-Catalog_Final.pdf
Dealer/Installer Locator → https://qa1.net/find-a-dealer/
Contact Tech Support → https://qa1.net/contact/
FAQs
Will QA1 make shocks for my vehicle if it’s not listed?
Probably — if it uses stud, eyelet, or T-bar mounts. Take proper measurements and contact QA1 Tech if you have questions.
What if I don’t have shocks installed yet?
If you are in the middle of your build and don’t have shocks, you can measure between the shock mounting points to get an accurate measurement. Raise the vehicle to its normal ride height by jacking the wheel and tire up to where you want it and take your measurements.
How much travel do I need?
When should I upgrade to coil-overs?
If you want ride-height adjustability, easy corner-weighting, or you’re converting leafs to a weld-in coil-over system.